How to Make Atlas Stone Molds
Training for strongman competition is going to introduce to you many new and challenging ways to lift weight. One of the most challenging of all involves picking up and stacking the Atlas stone. There is only one way to get good at lifting stones – by lifting stones. That means that you need to have Atlas stones as a key part of your strongman home gym.
The problem is, of course, that you can’t just buy an Atlas stone from Amazon. The cost of freight alone would crush your bank account. What you can do is to buy stone molds that allow you to make your own stones at home. In this article, we will review the best Atlas stone molds on the market today. We’ll also take you through the process of making your own Atlas stone weight.
A Few Easy Steps
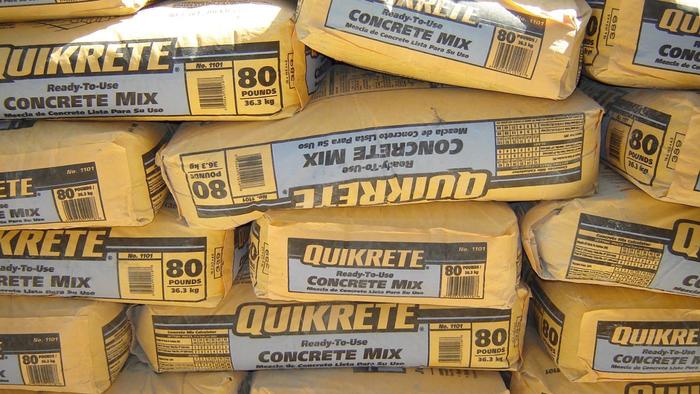
To make your own Atlas stone you are going to need a stone mold, concrete and water. You will also need Gorilla tape, a method of mixing your concrete such as a concrete mixing bag, a spray can lubricant, a respirator mask and rubber gloves.
It is always best to have at least the amount of concrete that matches the weight of the stone that you are making. So, if you are making a 200 pound stone, you want 200 pounds of concrete. Of course, water will add to the weight of the concrete, but it is always better to have too much than not enough. Make sure that you are buying a high strength concrete mix.
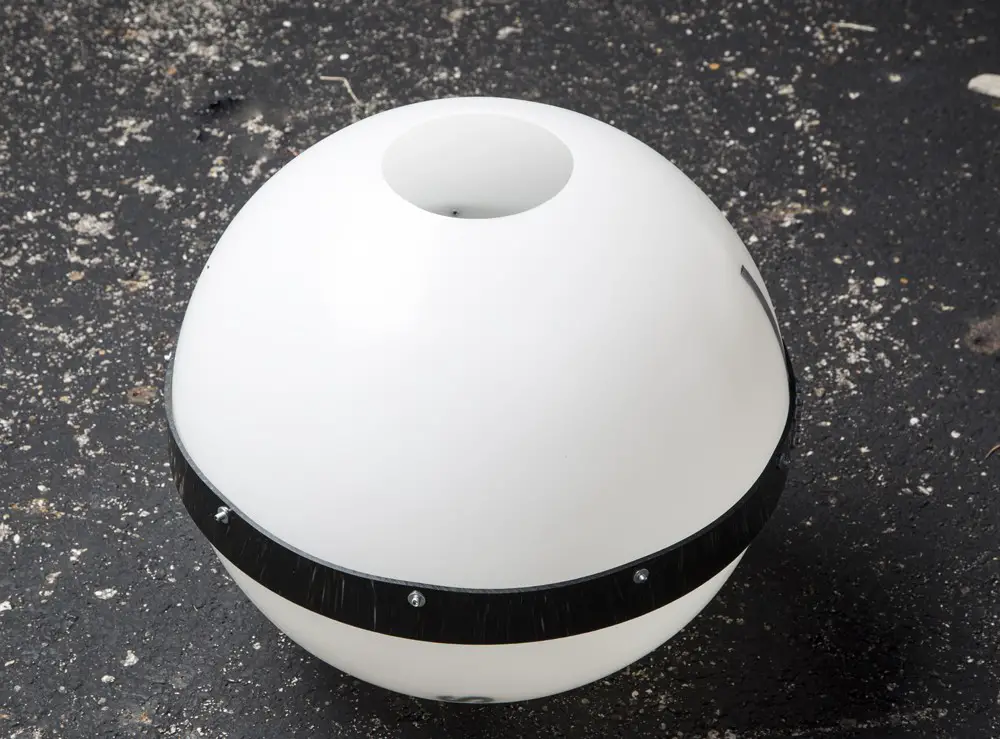
Before you start, you should spray the inside of the stone mold with lubricant. Then connect the two halves of the mold, lining up the seams and checking through the top hole to make sure that there are no gaps between the two hemispheres.
You should next tape the two hemispheres of the mold together using Gorilla tape. Simply place a number of vertical strips that cross the two hemispheres around the outside of the mold. You should put on about 8 pieces of tape. Then take another look through the top hole to ensure that the parting seam looks good and everything looks solid.
The next step is to nest the mold into something that will keep it immovable. This may be a tire or a 5 gallon bucket. You are now ready to mix your concrete. We suggest using a concrete mixing bag to do this. One big advantage of the mixing bag is that you don’t to use a scoop to pour the cement into the mold. You simply dump the concrete right into the mold.
When working with concrete, you need to ensure that you don’t breathe in the dust. That’s why you should wear a respirator and wear rubber gloves. Open the bag of concrete and then envelop the concrete mixing bag. Now pour the concrete powder into the mixing bag.
The next step is pour your water into the concrete mixing bag. For an 80 pound bag of concrete, you should add gallon and quarter of water. Then twist the top of the bag and enclose it with the provided velcro strap. Now grab the bag by the top and an end and vigorously shake it to mix. Do this to both ends of the bag.
Once the bag has been thoroughly mixed you can add strength fibers to make the concrete more durable. These are available from Slater Hardware. These will help to reinforce the concrete and make it more durable. Now go through with your hand to feel for any clumps in the concrete bag, breaking them up with your fingers.
You are now ready to transfer the concrete into the mold. The best way to lift the concrete bag is to hold onto a seam and then grab the bottom and pop it up onto your hip. From there, you can pour it into the mold. You simply repeat the process to fill the mold all the way up.
Once you close to get filling the mold, give it a shake and pat the sides in order to get the air bubbles to come to the top. Now take the base on which the mold is sitting (tire or bucket) and twist it back and forth several times. This will help the concrete to be a lot smoother on the inside.
You can now top off to completely fill the mold. Smooth off the top of the mold and pat around the sides once again. You will now have a concrete filled mold. You will also inevitably have concrete spill on the outside of the mold. You should clean this off with a rag.
You now need to let your mold sit for three days. To take the stone out of the mold you need a hammer and tap stick (most mold suppliers will include this with the mold purchase). Roll the mold out of its base support. Now remove the Gorilla tape. Now place the tap stick against the band at the seam of the two hemispheres. Place a piece of bracing timber under the underside of the mold to prevent it from rolling when you tap the top portion of the mold off. Now tap gently to remove the top hemisphere of the mold.
Roll the stone around so that the remaining hemisphere is at the top and again gently tap against it with the tap stick to release it from the stone. Now check your stone for an edge around the seam. You can easily smooth this out by hand.
The portion of the stone that had the top opening of the mold will be the roughest part. This will be the bottom of the stone. If you wish you can sand this down to smooth it out.
It doesn’t matter how strong the rest of your body is if your grip can’t keep up. Check out our in depth review of the best grip training equipment on the current market here.
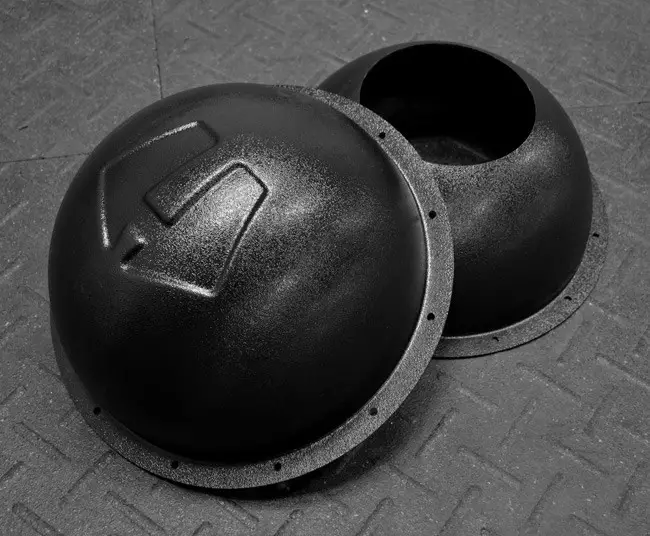
A Few Of The Molds Available
The two main producers of strongman stones are Slater Hardware and Hybrid Athletics. Slater’s mold range runs from 8 to 24 inches in diameter, with a weight range from 23 pounds to a massive 586 pounds. Molds range in price from $60 to $220.
Hybrid Athletics produce molds from 10 to 18 inches in diameter. The weight range is 42 to 246 pounds. Cost is between $80 and $140.
Let’s take a closer look at each of these stone lifting molds.
Slater Stone Molds
The Slater family have been in the hardware business since 1946, and have been producing strongman equipment since the beginning of the 21st century. They make atlas stones for the top strength athletes in the world. Their molds are top quality and easy to use. However, Slater molds do take a little extra time in the preparatory stage than Hybrid molds. That’s because Slater recommend using Gorilla tape to secure the two hemispheres of the mold before pouring the cement into it.
Slater sell strength fibers which you can add to the concrete in order to make it stronger.
The plastic used on the Slater mold is not as thick as on the Hybrid. That means that you have to take more care to ensure that the mold does not touch anything during the drying process. If it does you may end up with an indentation on the stone. Placing the mold in a solid tire is usually the best way to go.
When you open your Slater mold using the provided tap stick, you will reveal a smooth stone with a minimal edge around the center seam. This can usually be smoothed off just using your fingers. The Slater mold generally gives a smoother finish than the Hybrid.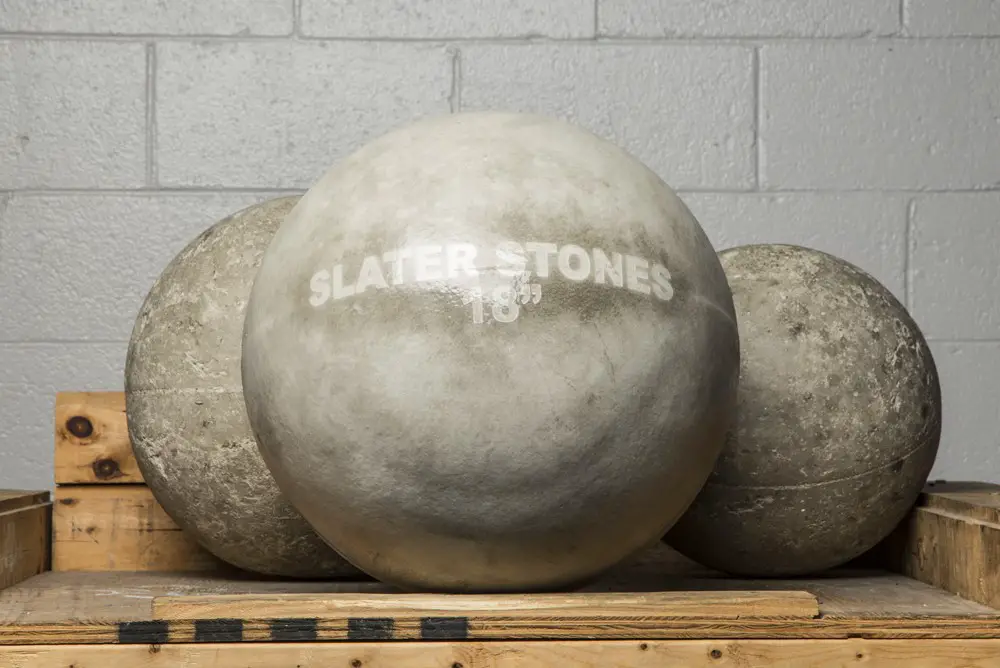
Slater molds offer a greater range of sizes and molds than Hybrid.
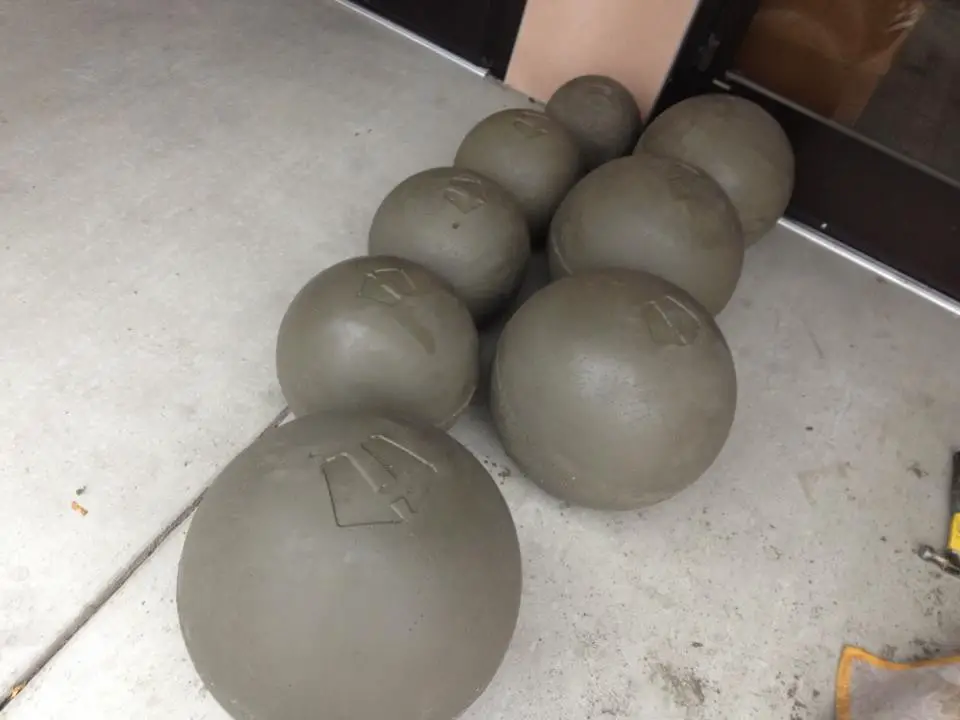
The Slater mold imprints the size of the stone and the Slater logo onto your Atlas stone. However, they do offer the facility to imprint your own gym or personal logo onto your stone.
Hybrid Molds
When using a Hybrid mold there is less set-up than when using a Slater mold. The two hemispheres of the mold are connected by zip ties and you don’t need to go the additional trouble of placing tape across them. Just connect the two halves and place the mold on top of a 5 gallon bucket and you are ready to go.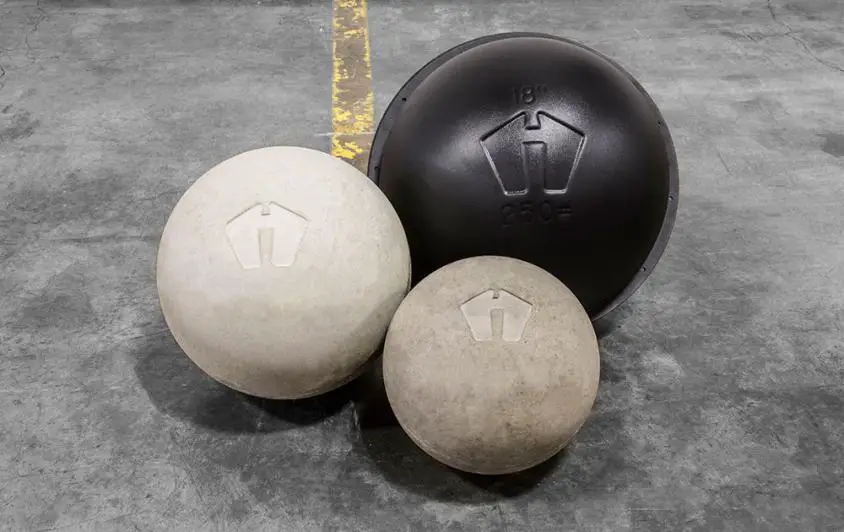
You will need to purchase zip ties to put the two sides of the mold together.
When you open the mold you will see a noticeable lip around the area where the two hemispheres meet on the Hybrid. You will probably have to chip this off with a screwdriver, being careful not to make any indentations in the Atlas ball mold. Because the surface of the ball is not as smooth as the Slater, you will also want to go over the stone with a piece of sandpaper. Hybrid stones will imprint an “H” onto each stone produced from their molds.
Conclusion
Making an Atlas stone is an easy proposition if you have the right mold and a high strength concrete. Both Hybrid and Slater offer quality molds that will produce strength stones that will last and last. When you start getting real strong, you will outgrow the Hybrid range, and will have to go with the Slater range.
To complete your Strongman home gym set up, you are going to need a quality log and axle set up. Check out our reviews of the best strongman log and axles on the current market here. For best Strongman training equipment review, you can click the following link to find out more.