How to Do a Proper Pull-Up
Pull-ups are probably the single best thing you can do to get stronger and build muscle, especially in your upper body. The problem is that a lot of people can’t do them – not even a single one. But that doesn’t mean that this great exercise is out of your league. Doing a proper pull-up can mean the difference between success and injuring yourself, setting you back even further.
Pull-ups are an excellent way to work your core and to build up your upper body strength. The one thing that many people fail to realize is that it takes time to build-up to the place where you can do them.
If you’re a beginner at these exercises, then you can’t jump in head-first and expect to do a proper pull-up. It takes time, dedication, and practice to do it right and to see the results you’re expecting to see. It is important to start with the basic moves and then move into full-fledged pull-ups when you’re ready. This isn’t a race to the finish line, it’s a marathon that everyone finishes at different times.
The one thing to be careful of above all else is having the ability to pace yourself. It is important to pay attention to your body and don’t work it too hard. If you do, you will be out of commission and not exercising at all, much less doing a proper pull-up. With that in mind, keep on reading to find out how to do a proper pull-up at the right pace. Ready? Set? Let’s get started!
WHAT’S SO GOOD ABOUT PULL-UPS, ANYWAY?
Not sure whether you should invest the time and energy into perfecting how to do your first pullup? Here are six reasons why doing so makes sense:
- Convenience – you can do pull-ups anywhere that you can find an overhead beam, making them one of the most convenient of all compound exercises.
- Compound exercise – just like the squat and the deadlift, the pull up is a compound movement that works virtually every muscle of your upper body. The effort required from so many muscle groups also releases human growth hormone and testosterone (take a look at the best testosterone booster supplements). That makes the pull up probably the single best thing you can do for the upper body.
- Progressive – Unlike pull-ups, it’s relatively easy to progressively increase the resistance on pull-ups. All you have to do is to strap a weight plate around your waist. And don’t worry if you can’t yet do a pull-up – this article will show you how!
- Variation – By simply changing your grip on the pull-up bar, you can instantly change the focus of the exercise, enabling you to target specific muscle groups.
- Grip strength – Pull-ups are one of the best ways to increase your grip strength. Doing so will benefit all of your weight training exercises. On such moves as deadlifts, the grip is usually what gives way before the working muscles. Performing pull-ups will greatly improve your grip.
- Fat Loss – Pull-ups will get your heart pumping and will burn calories, making them an effective fat burner.
Before you even get up on the bar, try some of these exercises to build the proper strength and control to help you when you’re finally ready for the real deal.
Dumbbell Holds
Dumbbell holds will help you to develop grip strength, which is often a limiting factor in the pull-up. Simply grab hold of pair of heavy dumbbells (a little heavier than you would use for the dumbbell bench press) and hold them at your sides for 30 seconds. Do 3 sets of 30-second holds.
Timed Hangs
Hang from a pull-up bar with your hands hanging straight down and your feet together and just a few inches off the ground. Hold for ten seconds, and then slowly work up to 30-second holds. As you hang focus on internally rotating your shoulders. This is one of the best ways on how to do your first pullup.
Kettlebell Bottom Up Press

Hold a kettlebell upside down by the handle in one hand with a bent elbow and at shoulder level. Now press the bell directly up overhead. Do 15 reps on each arm for 3 sets.
Read our guide on choosing the best kettlebells, and learn about the factors you should consider before buying.
Inverted Row
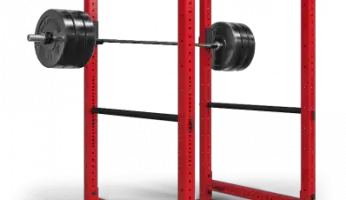
Lie underneath power rack with a barbell loaded racked at arm’s length. Reach up and grab a hold of the bar at shoulder width distance. Keeping your legs straight as you pull your body up to the bar. Squeeze your shoulder blades together and your elbows in close as you smoothly go up and down. Do 3 sets of 12 reps.
Start with Beginner’s Moves
The beginner’s moves below will get you headed in the right direction. Remember to use caution and take your time perfecting each move.

Flexed Arm Hangs
You’re not going to be able to do a proper pull-up until you build the strength up in your shoulders and arms. That’s where starting with flexed arm hangs comes in handy.
You will first want to grab a box and put it under the pull-up bar. You will then lift yourself up until your chin is over the bar. You will hang that way with your elbows flexed for as long as you are comfortable doing so. You will then slowly let yourself back down onto the box underneath you. Increase how often and how long you can do this task slowly, as you build up your way to doing pull-ups.
Do Some Dead Hangs
Doing dead hangs is another way to build up your arm strength and work your way up to doing pull-ups. It works a lot as flexed arm hangs. The only difference is that you pull yourself up an inch, while you pull your elbows to your side as you pull up.
Once this step is complete, bend your knees until they come up entirely off the box that you placed under the bar. Hold this for as long as it is comfortable for you to do so, then let yourself down. One important side note, your shoulder should not raise at all during this exercise. If they do, then you need to build more strength in your arms before you can move to during real pull-ups.
Practice Lowering Your Body Slowly
Lowering your body when attempting to do a pull-up can take quite a bit of practice as well. You need to practice lowering your body with a chair nearby, just in case you fall. You need to be an expert at lowering your body before you move onto an actual pull-up. Do this exercise every day. If you find yourself plummeting too fast every time, then you are not ready for pull-ups.
Set a Schedule
It’s important to focus on one aspect of doing pull-ups every day until you have it perfect. It’s best to start with hanging exercises every day, then transition into body lowering the after a day or two. As you start to feel more comfortable combine the two until you’re comfortable enough to do a proper pull-up.

How to Do a Proper Pull-Up
While it’s not easy to do a proper pull-up, it can be done after you have learned the above steps. The steps to do this pull-up are listed below for when you’re comfortable enough to try them.
• Start by grabbing the bar with your palms down
• Hang to the bar with your legs off the floor and your arms straight
• Now, pull yourself up by pointing your elbows towards the floor
• Go up all the way until your chin is over the bar
• Then lower your body until your arms are straight
These are the steps to doing a proper pull-up, but as a beginner, you need to start with the simple exercises discussed at the beginning of this guide. It’s important not to forget that people can get hurt when doing pull-ups. Whether it’s from falling, pulling a muscle, or hurting their back because they aren’t using proper form. In our next section, we are going to discuss the proper safety precautions you should take when doing pull-ups of any kind.
Resistance Band Progression
An alternative route on how to do your first pull up is to use a set of resistance bands. Resistance bands are typically 41 inches long. They are able to stretch to 2.5 times their length. They are constructed of up to 15 layers of continuous heavy-duty rubber.
Each band is color-coded and has a different strength rating, width, and thickness.
Here is a typical selection . . .
| 10 to 35 Pounds | 1/2 ” *4.5mm | |
| 30 to 60 Pounds | 3/4 ” *4.5mm | |
| 40 to 80 Pounds | 1.25 ” *4.5mm | |
| 50 to 125 Pounds | 1.75 ” *4.5mm | |
| 65 to 175 Pounds | 2.5″ *4.5mm |
HOW TO SELECT THE CORRECT BAND FOR YOU
The thicker the Pull-Up band, the more weight it takes off you. This means that the weaker and heavier you are, the thicker your Pull Up band will have to be.
If you are unable to do a single unassisted Pull Up, the chart below will guide you to your starting band.
| Your Weight | 90-120 lbs | 121-150 lbs | 151-200 lbs | 201-250 lbs | 251-300 lbs |
| Resistance Band Poundage | 40-80 lbs | 50-120 lbs | 50-120 lbs | 50-120 lbs | 60-150 lbs |
| Band Color |
PERFORMING BAND ASSISTED PULL UPS – HOW TO DO YOUR FIRST PULLUP
- Toss the Pull-Up band over a sturdy Pull Up bar. Pull one end of the band loop through the other end. The band will now be hanging down with a loop by your feet.
- Position one of your feet in the hanging end of the loop. Alternatively, you can place both knees in the loop. This will provide you with more assistance.
- Reach up to grab the bar with an underhand grip, hands shoulder-width apart.
- Initiating the movement from the middle of your back and your biceps, start to pull yourself directly up toward the top of the pull-up bar. Do not allow your body to swing or use a kipping motion to propel yourself up.
- It should take you approximately two seconds to lift your body to the point where your chin is over the bar. Hold this position for a second.
- Lower yourself under control back to the start position. This should take another two seconds.
Once you have worked your way up to being able to perform 10 Pull Ups with your starting band, you should move to the next one. Continue in this pattern advancing to a new band after achieving 10 assisted pull-ups. Once you are able to do 10 repetitions with the Purple band, progress to the Black and then the Red band. When you can perform 10 reps with the red band, you will be ready to tackle unassisted pull-ups.
Safety Precautions to Take
As with any other type of exercise, there are precautions you should take with pull-ups as well. Knowing the precautions prior to starting any new workout regimen is an important and necessary step to take.

Consult with Your Primary Health Care Provider First
You should never start a new workout plan without consulting your primary health care provider first, even if it is just a few simple pull-ups. Talk to him about any existing arm, shoulder, neck, or back problems.
Your doctor will let you know if he thinks that this type of workout plan is the best choice for you and your health. Once you get the all-clear, you can start learning to do the proper pull-up with no worries and a clean bill of health.
It may also be tempting to jump to reach the bar when you first start learning, but that is the wrong thing to do. It prevents you from strengthening the right muscles and could end in an accident or injury. You should also limit your pull-ups to two to three times per week to avoid muscle strain. Instead of doing them every day or back-to-back days, you will want to take a rest day in between.
This concludes our blog on how to do a proper pull-up and a few other tips and reminders that will keep you safe. Remember, while doing a pull-up isn’t easy if you stick with it the rewards are amazing. Happy Exercising, everyone!
Sources
- , How to do Pull-ups with Proper Form: The Definitive Guide, Informative Article
- , Women and Pull-Ups: 3 Secrets for Success You’ve Probably Never Tried, Informative Article
- , How to Do a Proper Pull-Up Routine, Informative Article