What is Butt Wink? – How to Squat Correctly with No Back Pain
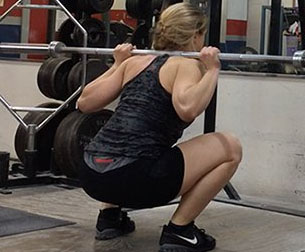
When you’re squatting, you are putting a lot of pressure on your spine. The heavier you squat, the more pressure you exert. A common form problem when squatting that can lead to serious back issues is the butt wink. Butt wink occurs when the lumbar spine rounds out at the bottom of a deep butt wink squat. The pelvis begins to slip backward and under the body. In this article, we’ll discover 11 steps to eliminating butt wink.
Step #1: Bar Positioning
The lower down your back you rest the bar, the more external shoulder mobility you’ll need. If you don’t have enough shoulder flexibility, your body will compensate with extraspinal extension, which leads to butt wink. But getting mobility from your spine is not a good thing as it puts too much pressure on the lumbar region, leading to posterior pelvic pain.
To reduce the amount of external shoulder rotation needed when descending into the squat, place the bar higher on your trapezius muscles. Keeping the bar in line with the caps of your deltoids will eliminate the need for external shoulder mobility and reduce the necessity to call in the lumbar spine to help compensate.
Step #2: Foam Rolling
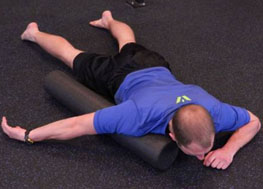
Having identified that lack of shoulder mobility is a significant contributor to butt wink, it makes sense to increase flexion and movement in the area before squatting. The best way to do this is with the aid of a foam roller.
Foam rolling will relieve tension in tight areas and increase range of motion. Identify the tight areas of your upper body that are inhibiting you when you butt wink squat. In addition to the shoulder, these could be the lats, pec minor or scapula. Apply direct pressure to these areas with foam rolling to loosen them up.
In need of an excellent foam roller? Check out our massive investigation of the best foam rollers on the market here
Step #3: External Rotation Exercises
Performing a couple of external rotation exercises will increase your shoulder mobility, further reducing the need for lumbar recruitment when squatting.
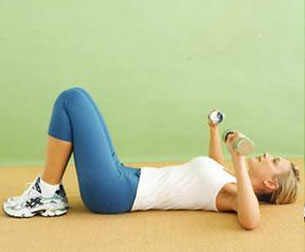
For the first move, lay on your back with your arms at 90 degrees and a pair of light dumbbells in your hands. With your elbows staying on the floor throughout the movement, bring your hands from the level to an upright position and back down again. Perform 2 sets of 12 reps.
For the second move, place your arm on top of a bench with a lightweight in your hand. You want your upper arm to be parallel to the floor, palm facing down. Now, rotate from the shoulder to bring the arm up to shoulder height. Over time, you should try to extend the range of motion that you can achieve.
Step #4: Dynamic Stretching
Stretching to improve your external rotation is critical to eliminating butt wink. Here are Two key moves:
-
Bar Roll
Position yourself under an unloaded squat bar. Set the bar high on your shoulders and reach back to grab hold of the bar. Now, one side at a time, rotate your shoulders up. It will bring your elbow up to about the level of your ears. This move is a perfect one to eliminating butt wink. Do 10 reps on each side.
-
Loading Bar Stretch
Position yourself under an unloaded squat bar. Set the bar high on your shoulders and reach back to grab hold of the bar. Now, point the elbows up as high as they can go. Hold the extended position for 30 seconds. This move is crucial to eliminating butt wink. Do this for 5 reps.
Step #5: Breathing
When most people squat, they breathe only with their chest. It is especially the case when wearing a squatting belt — breathing from the chest forces the body into an anterior pelvic tilt, which places a lot of pressure on the lower spine, especially when pushing heavy weight. Breathing high extends the spine and automatically moves the butt back.
To correct this issue, you need to consciously breathe through your stomach, primarily as you draw breath into your body before going into the squat descent. It will keep your spine in a neutral position.
Step #6: Practicing the Set Up

Most people have been taught to arch back by extending the spine when they descend into the butt wink squat. Rather than sitting back into the squat, they push back, leading to a posterior pelvic tilt.
To correct this issue, you need to retrain yourself to push back with the hips, rather than the spine. Use an empty Olympic bar to practice the move, and as you descend, open up the hips to go down and back, while keeping the spine neutral.
Step #7: Hamstring Flexibility
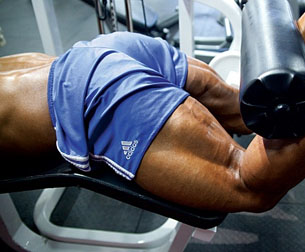
In addition to a lack of external shoulder mobility, squat butt wink results from lack of hamstring mobility. When we squat down into a full squat, the distance between the pelvis and the knee extends fully. If you don’t have the flexibility in the hamstrings, your body will compensate with a posterior tilt, leading to butt wink. To overcome this problem, you need to stretch your hamstrings in the anterior tilt position. These moves are the perfect one to eliminating butt wink.
Sit on a bench with one leg stretched out in front of you. Now place your hands on your hips and get into anterior pelvic tilt position. Do this by extending your pelvis forward. It will allow you to feel the stretch in your hamstrings without having to bend forward. Hold this position for thirty seconds, and then repeat on the other side.
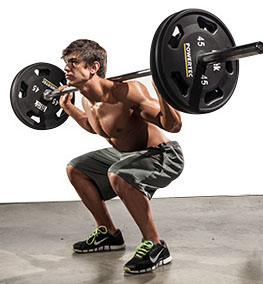
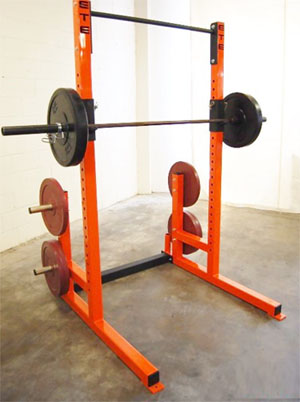
Step #8: Perfect Your Squat Form: Set Up Phase
The first thing you need to do is to set the bar at the proper height within the squat rack. That correct height is at the mid-point of the chest.
Once you have it at that level, you need to decide whether you are going to be doing a high bar or a low bar squat. The difference comes down to where the bar is going to be sitting across your shoulders.
The advantage of the low bar squat is that when the bar is low, you can lift more weight because the weight is closer to your center of gravity. It puts you in a stronger position. The downside is that when the bar is down low, it puts more stress on your shoulders and biceps tendons. For that reason alone, you should be wary about doing the low bar squat. The high bar squat, then, should be your preferred bar position. It places the bar across the nape of your neck as opposed to your traps.
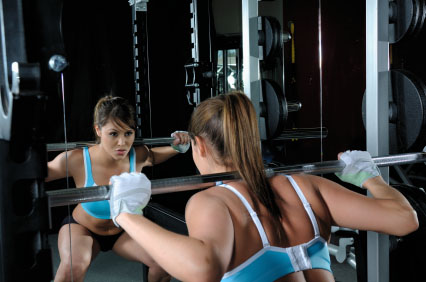
Step #9: Perfect Your Squat Form: Unracking Phase

Begin the unracking process by grabbing the bar with a thumbless grip, with the thumb on the same side of the bar as the fingers. Set your grip approximately shoulder width apart. Now duck your head under the bar, bringing both feet directly and vertically under the bar. The feet should be shoulder width apart. The toes should be externally rotated between 5 and 15 degrees.
From the set position, take a big breath, squeeze the chest up, keep the back nice and tight and then do a mini squat by extending the knees to assume an upright position. Take one step back. You are now in the set position to begin the movement.
Although many coaches teach that you should look up to the ceiling during the squat, this is an incorrect position. Your head needs to remain neutral throughout the movement. To keep your neck neutral focus your eyes on the point where the wall meets the floor. Doing so maintains the neutral curve of the spine, making the exercise safer, and ensuring proper balance.
Step #10: Perfect Your Squat Form: The Hip Brake
Once your neck is straight, and your core braced, you need to focus on braking with the hips. It involves initiating the movement by sticking your butt back. Do not start with a knee break, which would include jutting your knees forward. To avoid this start by pushing the butt back with the hip break and making sure that your weight is lowered onto your heels.
To squat correctly, you need to be positioned squarely. That means that your feet need to be square on to one another in a line and the hips should be square on to the feet. Don’t open or rotate the hips, or you will move out of the square on position. If you do squat when your hips are not square, one of your knees will cave in, leading to potentially debilitating problems.
The best way to check that your hips are in the correct position is to squeeze your glutes tight. It will have the effect of leveling off the hips. When you come up from each rep, you should likewise squeeze the glutes to check your hip alignment.
Step #11: The Movement Phase
- How low should you squat?
As you drop down, you want to get to the point where the crease in the hip is lower than the knee. That means that the proper squat depth should be a little deeper than parallel. Power straight back up to the starting position. Your knee alignment during the movement is essential. It is common to see the knees caving in as you squat, especially in the transition between lowering and lifting.
Think about spreading the floor. Your feet will not move, but you will have an outward pressure on the floor, essentially pushing your knees out. It should feel as though you are squatting in between your legs and not on top of your legs.
At the bottom of the movement, the weight should still be on the heels. The knees need to be in line with the toes, and the back should be arched. Take a deep breath on the way up. Once you get back to the start position, you need to decide whether or not to lock the knees out. If you’re going heavy, you should come up, fully extending the knee.
Have you ever tried barbell hack squats? They are a great quad builder that takes all the pressure off your spine. Find out all about hack squat machines.
Conclusion
Lower back pain from squats is no fun. It’s often the result of butt wink, the rounding of the lumbar spine in the bottom squat position. The leading causes of butt wink that we’ve identified are lack of external shoulder rotation and inflexible hamstrings.
You can eliminate butt wink and other spinal problems without having to ditch the number one gym exercise by following our 11 step guide to eliminating butt wink. Consistently apply these exercises and technique pointers to eliminate butt wink, and you’ll be well on your way to a back pain-free squatting future.